FleXplorer
Explore Everything!
Latest News
Applications / Installations
Mitos Web Search Engine
Mitos (formerly known as Groogle) is a prototype Web search engine that is being developed by the Department of Computer Science of the University of Crete. fleXplorer is used by Mitos for offering general purpose browsing and exploration services. Currently, and on the basis of the top-L answer of each submitted query, the following five facets are created and offered to users:
- the hierarchy or clusters derived by a clustering algorithm
- web domain, a hierarchy is defined (e.g. csd.uoc.gr < uoc.gr < gr)
- format type (e.g. pdf, html, doc, etc), no hierarchy is created in this case
- language of a document based on the encoding of a web page
- (modification) date hierarchy
Console Client
The following java file contains a console client which creates a materialized faceted taxonomy and follows the faceted search interaction paradigm. ConsoleClient.java.
Installation Steps:
- Create a new Java project using a IDE.
- Create a new package with the name clients.
- Move the ConsoleClient.java into the clients package.
- Add to the libraries of the project the fleXplorer.jar. Download it from here.
- Build the project and run the ConsoleClient.
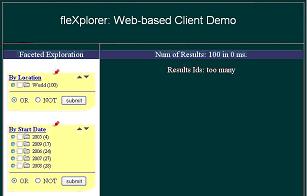
Web-based Graphical Client
This is a web-based graphical client of fleXplorer. In more details, it loads the facets and the records that are described by
the facets correctly to the main memory and provides faceted exploration services. Below are described in more details the features:
1. Loading facets and records.
2. Open and close facets.
3. Ordering of facets – drag and drop.
4. Zoom-in action on non hierarchical facet.
5. Zoom-in action on hierarchical facet.
6. Zoom-out action on hierarchical facet by selecting a broader term.
7. Zoom-out by selecting the top element term (the name of the facet)
8. Display of focus.
9. Response time
Download the client from here.
Download the client source code from here.
Installation Steps:
- Set up Apache Tomcat.
- Unzip the WebBasedClient.zip file. This file contains a folder named WebBasedClient and two files, the Records.xml and Facets.txt file.
- Move the WebBasedClient folder to the webapps/ file of Apache Tomcat. WebBasedClient folder contains the web application of faceted exploration.
- Move the Records.xml and Facets.txt files to the folder that $CATALINA_HOME variable shows. Records.xml file contains the records in a specific xml format. Facets.txt file contains the characteristics of each facet in a specific format. Formats are described here.
- Start up the Apache Tomcat web server.
- Open the Firefox browser to the url: http://localhost:8080/WebBasedClient. Be sure that the server port is the 8080; in other case use the specific port which has been allocated by Apache Tomcat. If all the above steps are executed correctly, the below screen will be displayed.
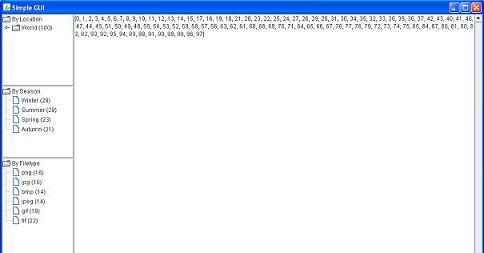
Desktop-based Graphical Client
This is a Desktop-based graphical client of fleXplorer. It provides the same functionality as the above web-based client. Download the client from here.
Download the client source code from here.
Installation Steps:
- Unzip the fleXplorerDesktopClient.zip file. This file contains a jar named fleXplorerDesktopClient.jar the files, Records.xml, Facets.txt file and a folder named lib which contains the fleXplorer.jar.
- Records.xml file contains the records in a specific xml format. Facets.txt file contains the characteristics of each facet in a specific format. Formats are described here.
- To run the Client just decompress the .zip file and double click the fleXplorerDesktopClient.jar file. To run the Client from the console just type "java -jar fleXplorerDesktopClient.jar". Be carefull, the lib folder must be in the same folder with fleXplorerDesktopClient.jar.
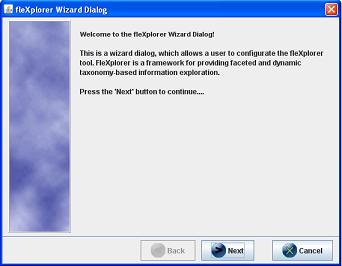
- If Client runs correctly, the following screen should be shown. Just press next.
- Then, you have to define the faceted taxonomy (see the following image).
Press the button "Load Taxonomies", select Facets.txt and press "Open". Wait until the message "Facets loaded successfully to be shown." and then press "Next".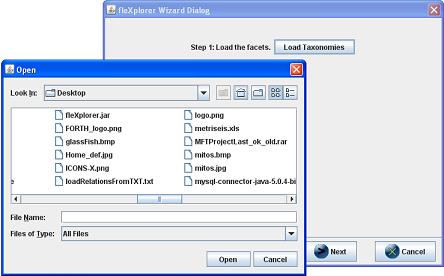
- The next step is to load the objects. Follow the same steps as in the previous step and press the button "Final".
- If all the above steps are executed correctly, the below screen will be displayed.